
Showing posts with label tutorial. Show all posts
Showing posts with label tutorial. Show all posts
Wednesday, 11 December 2013

Wednesday, 27 November 2013
Christmas stocking tutorial
Believe it or not, it's that time of the year again. To get you in the festive mood we are sharing this gorgeous Christmas stock tutorial.
This quick and easy to make Christmas stocking tutorial by sewlikemymom.com is one of our favorite.

It doesn’t take much to make your own set of personalized stockings! They’re also fast to whip up,
The finished size is 17.5″ long from top of folded cuff to toe, 21.5″ unfolded, and 6.5″ wide.
For each stocking you’ll need:
2 outside pieces
2 lining pieces
2 cuff pieces
1 6″ piece of ribbon
applique (optional)
2 outside pieces
2 lining pieces
2 cuff pieces
1 6″ piece of ribbon
applique (optional)
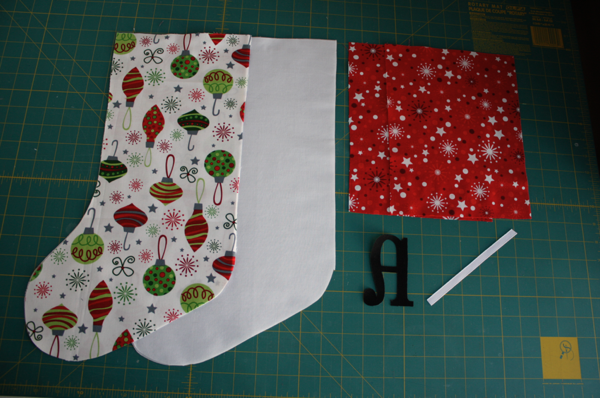
This is actually a great project for fat quarters! The stockings I made for us came entirely from fat quarters and 4 out of the 5 of these did as well. To make your stockings fairly cheaply, and to have them coordinate instead of match exactly, search for a fat quarter bundle on etsy. It takes 1 FQ for each stocking, and 1 produces 2 cuffs.
First, iron the cuff pieces in half.
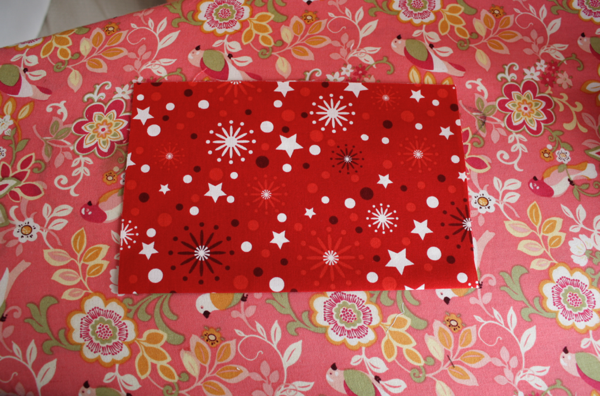
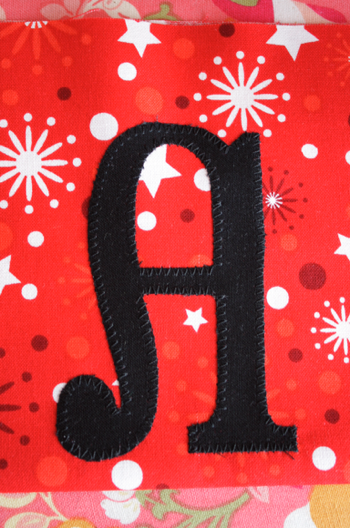
Then iron on your applique. For these, I used Pharmacy font and traced it from MS Word at size 550. Put the fold on the bottom and the raw edges on the top before ironing the applique. I know this seems backwards, but trust me, it needs to go on the top half. To center mine when the cuff is down, I placed the letters 3/8″ above the fold.
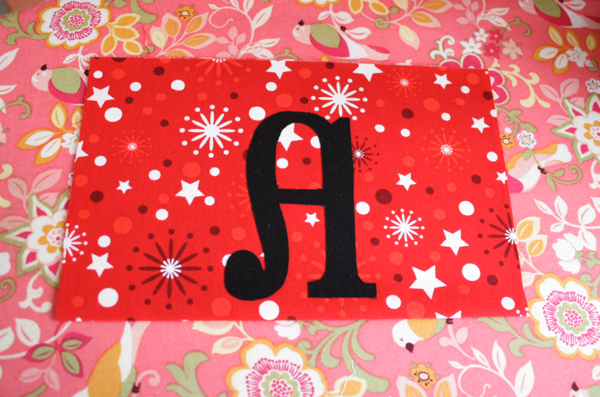
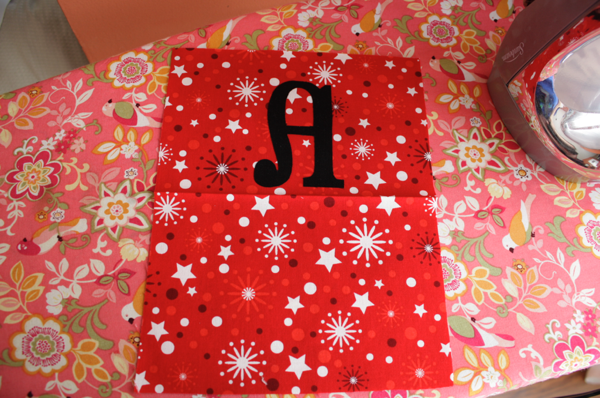
Then applique around the letter. If you need more help on this, see my applique tutorial and the tutorial on appliqueing curves.
Now decide which way your stockings will hang and with right sides together, sew the cuff piece with the applique to the front stocking piece. When you do this, make sure the applique is facing the foot of the stocking.
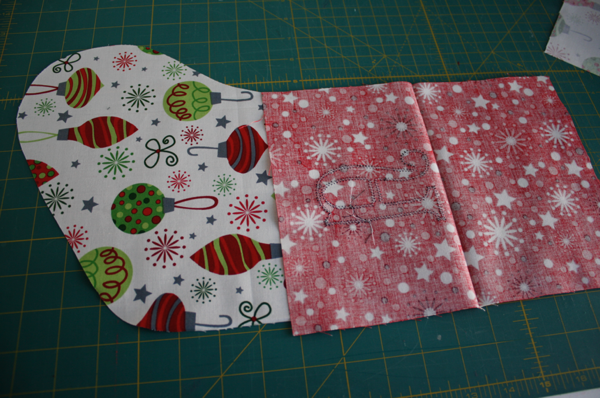
Then sew the same lining piece to the other side of the cuff with right sides together.
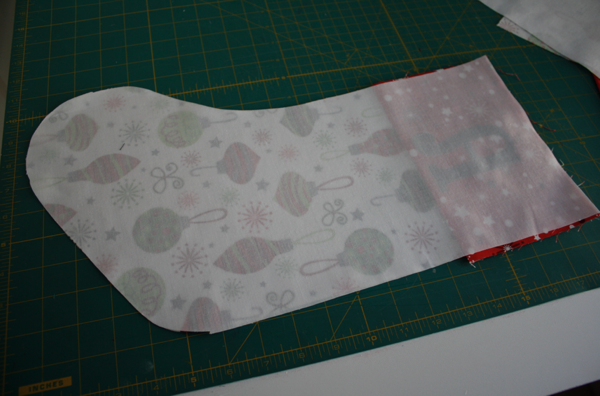
You’ll have something that looks like this:
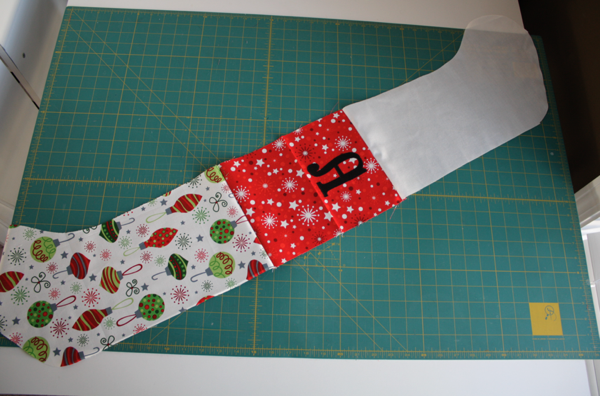
Press your seams to the middle.
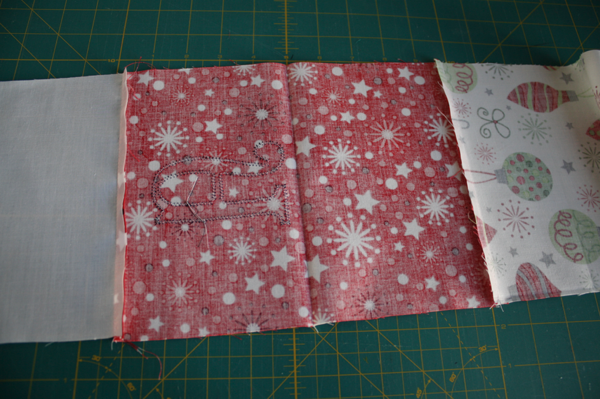
Repeat with the back pieces.
Lay the front and back together with right sides facing each other, lining up your cuff pieces.
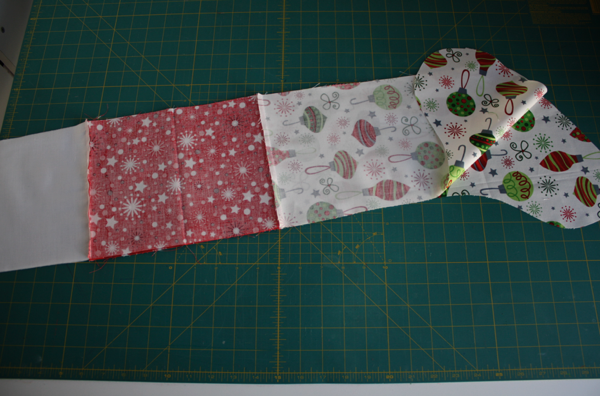
Take the 6″ of ribbon and make it into a loop.
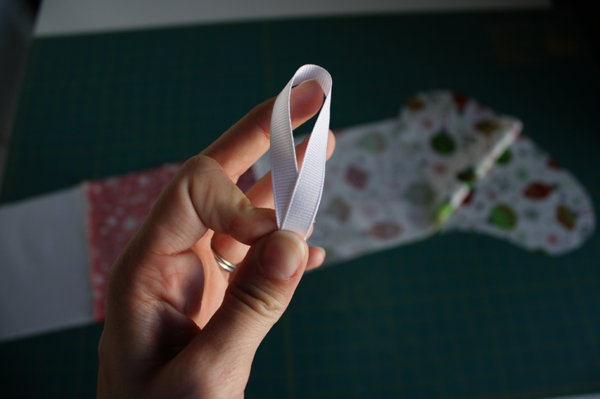
Place it between your lining layers on the BACK side (heel side) of the stocking with the loop on the inside. Line it up right where the lining meets the cuff. Pin in place.
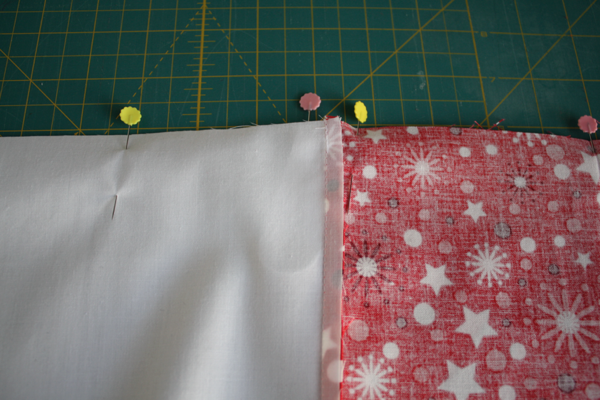
Pin the stocking pieces together. I usually don’t pin things, but I wanted to make sure I kept this looking nice.
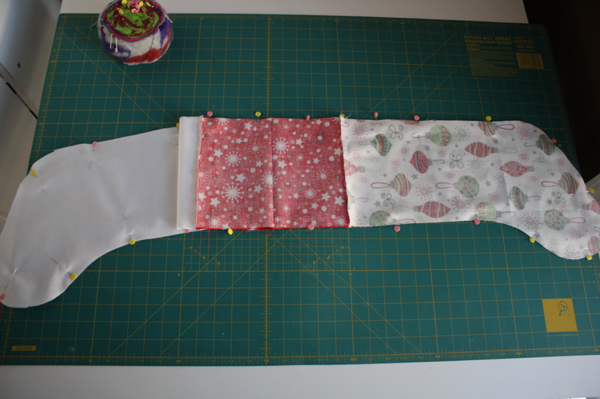
To sew them together, I started in the “sole” of the lining. I sew the lining together at 3/8″ seam allowance and when I get to the cuff, I gradually move it over to 1/4″ seam allowance. I do this to make sure the lining fits perfectly inside the stocking when put together and it doesn’t lump or bulge.
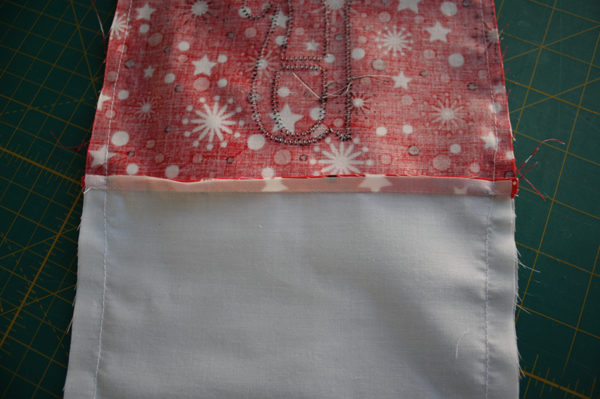
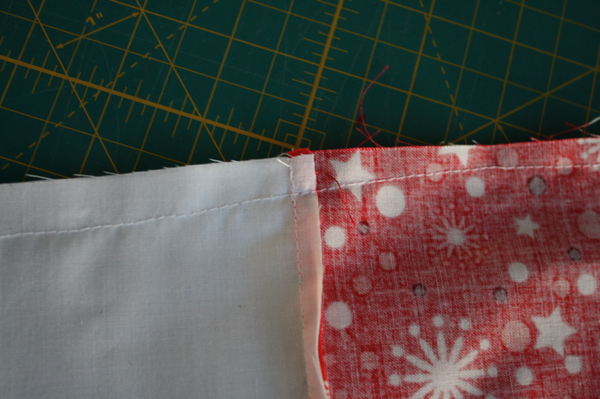
Leave a hole a few inches wide along the bottom of the lining to turn the stocking through.
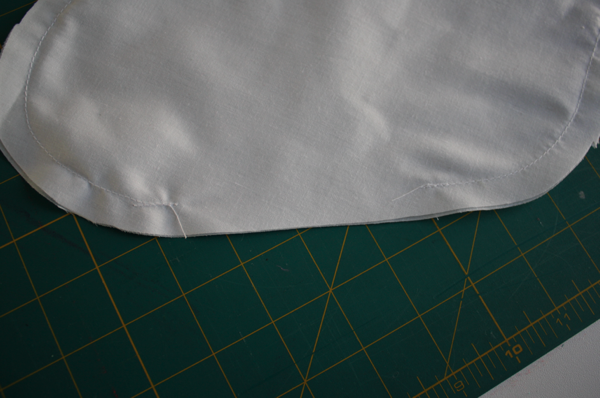
To make sure your curves lay flat, you need to clip them. I cheat and use pinking shears.
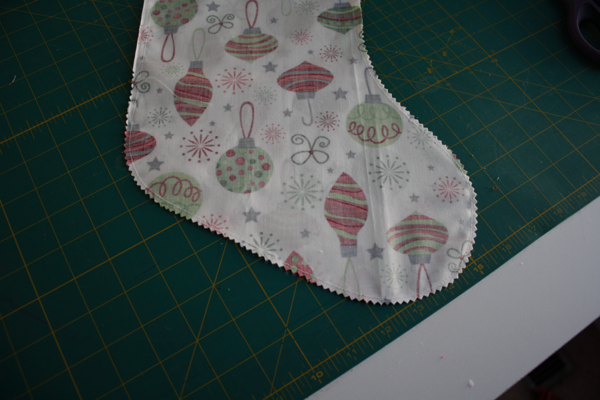
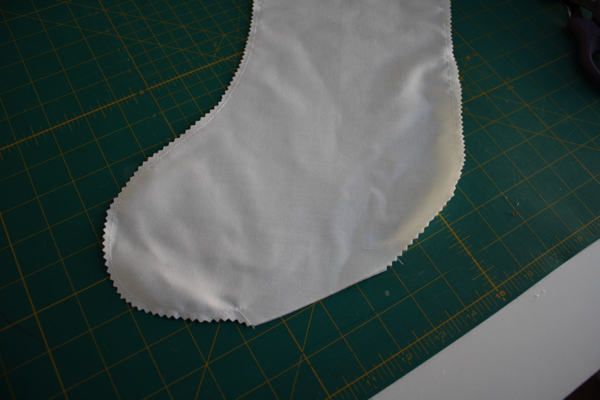
Turn the stocking through your hole and iron everything flat.
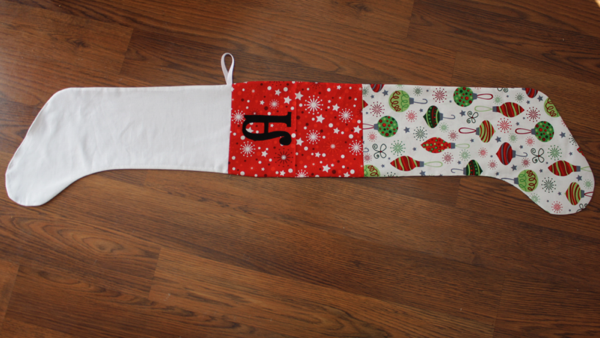
Sew the hole in the lining closed, stuff the lining into the outer pieces, and you’re done!!
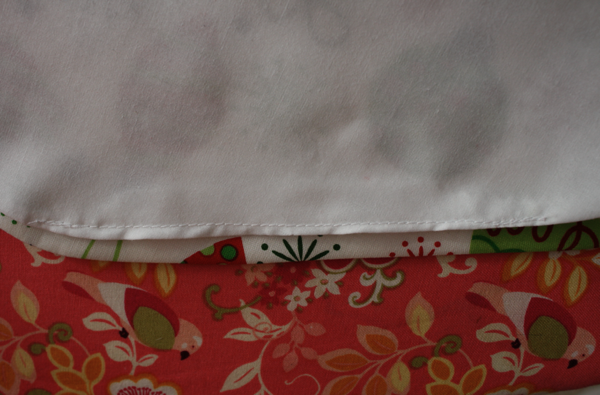
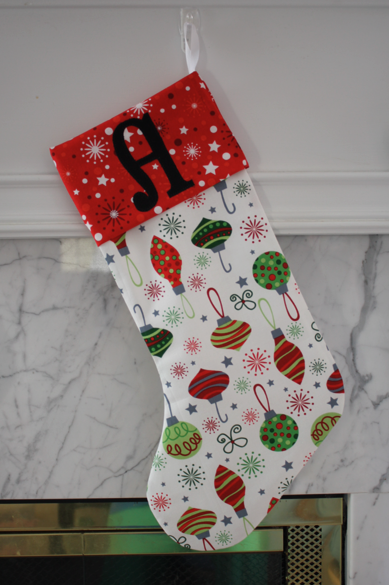
If you’re making more than one, I recommend doing them assembly-line style. It goes faster!
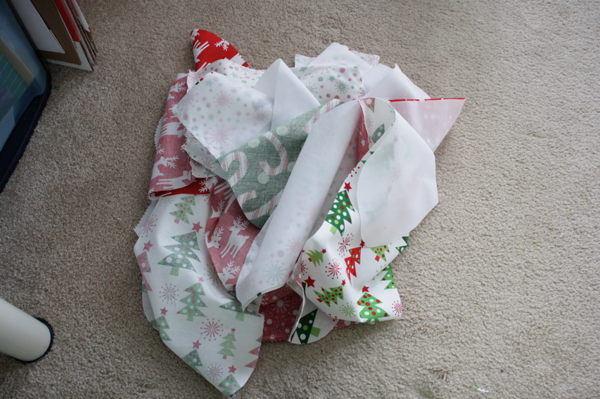
Enjoy!
Check out our ONLINE CATALOGUE for more on our range of fabulous fabrics. While you’re at it why not send us a FRIEND REQUEST on Facebook and FOLLOW US on Twitter. You can also FIND US on Pinterest.
Saturday, 23 November 2013
Tutorial: Babydoll Dress Perfect for Beginner Sewers.
Tutorial: Babydoll Dress Perfect for Beginner Sewers
This Baby Doll Dress by Monica Poole is the perfect project for the beginner seamstress.

- Scissors
- Tape Measure
- Tracing paper for pattern (optional)
- Thread to match fabric
- Bias Binding
- Thin Elastic
- Sewing Machine or you can hand sew
To make:
1. Cut the pattern or trace and cut the pattern to size.


4. Cut out the fabric.
5. Prepare the bias binding (skip this step if you have pre made bias binding).
6. Neaten fabric edges use zig-zag stitch.
7. Sew the shoulder seams then press the seams open.
8. Hem the sleeves.
9. Gather the sleeve edge with elastic.

5. Prepare the bias binding (skip this step if you have pre made bias binding).
6. Neaten fabric edges use zig-zag stitch.
7. Sew the shoulder seams then press the seams open.
8. Hem the sleeves.
9. Gather the sleeve edge with elastic.

10. Sew the side seams.
11. Double sew the underarms for stronger hold.
12. High waist drawstring casing.
 13. Make up the draw string.
14. Hem the dress.
15. Bind the neck.
16. Finish by tying a bow in the front.
11. Double sew the underarms for stronger hold.
12. High waist drawstring casing.
 13. Make up the draw string.
14. Hem the dress.
15. Bind the neck.
16. Finish by tying a bow in the front.

Gorgeous!
I truly love this tutorial! I hope you enjoy it as much as I have.
Check out our ONLINE CATALOGUE for more on our range of fabulous fabrics. While you’re at it why not send us a FRIEND REQUEST on Facebook and FOLLOW US on Twitter. You can also FIND US on Pinterest.
Saturday, 9 November 2013
How to Make a Sewing Machine Cover
Check out our ONLINE CATALOGUE for more on our range of fabulous fabrics. While you’re at it why not send us a FRIEND REQUEST on Facebook and FOLLOW US on Twitter. You can also FIND US on Pinterest.
Sunday, 3 November 2013
How to make a fabric basket/bowl tutorial
This has to be one of my favorites from the genius herself, Crafty Gemini.
It's finally here!
My step-by-step video tutorial on how to make these adorable fabric baskets/bowls.

This is the one I make the tutorial.. black, white and hot pink! Gotta love it!

Check out our ONLINE CATALOGUE for more on our range of fabulous fabrics. While you’re at it why not send us a FRIEND REQUEST on Facebook and FOLLOW US on Twitter. You can also FIND US on Pinterest.
Monday, 19 August 2013
Long stemmed fabric flowers DIY

You may have noticed that we’ve embraced a trend of late – bouquets. We’ve shared with you button bouquets and more button bouquets and now we’re onto something a tad different: long-stemmed fabric roses. These will look great in your arms, a vase or anywhere really.
Click here for Snowy Bliss’ awesome tutorial.
As you can see, these look great when made using printed fabrics. We therefore suggest you check in at your local Fabric and Textile Warehouse. There you’ll find an awesome range of printed cottons at super low prices. Want to learn more? Then give Just give us a call on our GOLDEN NUMBER (0861 322 839 | 0861 FAB TEX).
Check out our ONLINE CATALOGUE for more on our range of fabulous fabrics. While you’re at it why not send us a FRIEND REQUEST on Facebook and FOLLOW US on Twitter. You can also FIND US on Pinterest.
Thursday, 15 August 2013
DYI tooth fairy pillow
We’ve introduced to Mayi Carles of Heartmade before and now we’ve got another of her terrific tutorials to share with you today. This time it’s for the little ones – a tooth fairy pillow.
- This little felt envelope is perfect for storing those baby teeth before the tooth fairy makes the exchange. It’s also a great place to stash the cash.

Looking for fab fabrics for this project or the next? Well, you’re in luck! At Fabric and Textile Warehouse you’ll find a wide range of fabrics, lace, and more. Just pop on down to your local store. Feeling a tad lazy? Then, just give us a call on our GOLDEN NUMBER (0861 322 839 | 0861 FAB TEX) to find out more about what’s in stock and on special. You can also take a sneak peek at our ONLINE CATALOGOUE when you click here.
Wednesday, 14 August 2013
DIY fashion: the pinwheel skirt

We recently shared with you a tutorial on creating pinwheel accessories for your hair and now we’ve got something just as imaginative and fun: the pinwheel skirt. This fabulously fashionable tutorial comes from the creative mind of Leanne Barlow of Elle Apparel, and can be found here. Enjoy!
Looking for fab fabrics for this project or the next? Well, you’re in luck! At Fabric and Textile Warehouse you’ll find a wide range of fabrics, lace, and more. Just pop on down to your local store. Feeling a tad lazy? Then, just give us a call on our GOLDEN NUMBER (0861 322 839 | 0861 FAB TEX) to find out more about what’s in stock and on special. You can also take a sneak peek at our ONLINE CATALOGOUE when you click here.
Monday, 12 August 2013
DIY felt pinwheel comb

There is just something so whimsical about pinwheels. We suggest adding a bit of charm to your everyday wear with these playful pinwheel combs from Heartmade. Not a comb kinda girl? Then add them to bobby pins, headbands, clips and/or broach pins.
Find felt and much, much more at your local Fabric and Textile Warehouse. Just give us a call on our GOLDEN NUMBER (0861 322 839 | 0861 FAB TEX) for more info.
Before you log off, why not check out our online catalogue. You could also join our social network. Just send us a FRIEND REQUEST on Facebook, FOLLOW US on Twitter and/or FIND US on Pinterest. That way you’ll be kept up=to-date with our latest news and specials.
Saturday, 10 August 2013
DIY lace votives

Here’s a super easy, ultra-quick and charming little project for your home from Cassie of Hi Sugarplum.
You’ll need:
Lace
Glass votive
Ribbon / bakers twine
Double-side tape or heat resistant glue for a more permanent option
Instructions:
- Attach the lace to the glass with a small piece of tape.
- Tie the ribbon or twine around the glass.
- Plop a candle into your votive, light it and enjoy.
As you well know, we adore lace in every shape and colour, which is why we have such an extensive selection available in store. Find out more when you give us a call on our GOLDEN NUMBER (0861 322 839 | 0861 FAB TEX). You can also catch a glimpse at our collections ONLINE. While you’re at it why not send us a FRIEND REQUEST on Facebook and FOLLOW US on Twitter. You can also FIND US on Pinterest.
Friday, 9 August 2013
Button bouquet: round two
We’ve already shared one button bouquet with you, and now we’re bringing you another. This time you’ll need a bit more than just an extensive button collection, but the result is just as spectacular.

You’ll need:
Buttons
Felt
Needle & thread
Ribbon
Scissors
Skewer sticks
Instructions:
- Start by cutting flowers from your felt.
- Thread the buttons onto your felt flowers, making sure to keep and excess length of thread on the backside of the flower. You’ll need this thread to secure the flower to the front of the stick. Alternatively, you could always use a spot of glue to keep it in place.
- Tie small strips of ribbon around the stick to resemble leaves.
- Plop your bouquet in a vase and you’re good to go.
This tutorial was adapted from the Spring Bouquet by American Crafts Studio.
Looking for fab fabrics for this project or the next? Well, you’re in luck! At Fabric and Textile Warehouse you’ll find a wide range of fabrics, lace, and more. Just pop on down to your local store. Feeling a tad lazy? Then, just give us a call on our GOLDEN NUMBER (0861 322 839 | 0861 FAB TEX) to find out more about what’s in stock and on special. You can also take a sneak peek at our ONLINE CATALOGOUE when you click here.
Tuesday, 6 August 2013
Get creative with your bedroom décor – make your own duvet cover

We don’t know about you, but we find very little more infuriating than the hunt for new bedding. All those choices and none of them quite the right one. Maybe that’s way we love this DIY duvet cover tutorial from Prudent Baby so much. Not only does it give you the option of using your favourite fabric to create your personal dreamland, by it also has all the dimensions you need to make duvet covers for toddlers and kings. Click here for the tutorial.
Cotton fabrics make for great covers and we’ve got one hell of a range available. Give us a call on our GOLDEN NUMBER (0861 322 839 | 0861 FAB TEX) for info. You can also take a sneak peek at our ONLINE CATALOGOUE when you click here. Hey, while you’re at it why not send us a FRIEND REQUEST on Facebook and FOLLOW US on Twitter. You can also FIND US on Pinterest.
Sunday, 4 August 2013
A mixing of media: adding watercolours to your embroidery
We’ve introduced you to Urban Threads before, but we absolutely had to share this piece of creative genius with you. Inspired by their painterly style designs, this tutorial combines watercolours with embroidery. To get the effect you’ll need to combine your creative talents with your stitching skills and fabric paint collection.

Keen on seeing how it’s done? Then click here. Pay particular attention as to why it’s important to stop the bleeding process. You’ll be glad you did.
The folks at Urban Threads recommend using water absorbent, natural fibre fabric for this project. Give us a call on our GOLDEN NUMBER (0861 322 839 | 0861 FAB TEX) to find out more about what fabrics are in stock and on special at your local store.
You can also check out our ONLINE CATALOGUE here. And don’t forget to send us a FRIEND REQUEST on Facebook or FOLLOW on Twitter to stay up to date with the latest news and specials. You can now also FIND US on Pinterest.
Saturday, 3 August 2013
Beautiful button bouquets for your big day

If you haven’t already, we suggest you visit Cut Out and Keep – an online community committed to making and sharing the best crafts the digital universe has to offer. Take this button bouquet for instance. Created and shared by Sandy L. it is the perfect for those looking for something a little different for their big day.
Click here to view the tutorial.
Looking to find out more about what’s in stock and on special? Then, give us a call on our GOLDEN NUMBER (0861 322 839 | 0861 FAB TEX). You could also visit us online and take a peek at our catalogue here. Don’t forget to send us a FRIEND REQUEST on Facebook, FOLLOW US on Twitter and FIND US on Pinterest.
Monday, 29 July 2013
From a necktie to bracelets – more upcycled accessories
 If you enjoyed our previous post on converting a tie into a necklace, you’ll love this gem from Chasing 2 Monkeys. This tutorial will show just how easy it is to create neck tie bracelets.
You’ll need to raid your button stash for this one, or you could always attack ours. We’ve got bucket loads of buttons, available in every size, shape and colour.
Give us a call on our GOLDEN NUMBER (0861 322 839 | 0861 FAB TEX) for more on what’s in stock and in store for you. You can also check out our ONLINE CATALOGUE. And don’t forget to send us a FRIEND REQUEST on Facebook or FOLLOW on Twitter to stay up to date with the latest news and specials. You can now also FIND US on Pinterest.
Sunday, 28 July 2013
From a tie to a necklace – an upcycled DIY
 If you’ve suddenly found yourself single and your cupboard still filled with his junk, you might be looking to make a statement. Here’s a rather creative and fashionable way to declare your independence – a DIY upcycle that transforms one of his old ties into your new necklace.
Thanks go to Shelly of Crazy Wonderful for putting together this DIY adventure.
You’ll need:
- A tie
- A Button
- Scissors
- Pins
- Needle and thread
Instructions:
- Lay out your tie, and start folding and pining in a manner that's pleasing to you. Lay it around your neck and add or remove folds to get the length you want. Keep in mind you'll want to be able to have the necklace slip on and off your head after the button is sewn down.

- Take your needle and thread and tack down the folds from the back side of the necklace.

- Place your button or accent piece and stitch down.

Find all your essentials at your local Fabric and Textile Warehouse. Give us a call on our GOLDEN NUMBER (0861 322 839 | 0861 FAB TEX) for more on what’s in stock and in store for you. You can also check out our ONLINE CATALOGUE.
Subscribe to:
Posts (Atom)