
Supplies:
Felt
Sewing
machine
Thread
Scissors
Ruler
Button
Instructions:
- Start by cutting your felt into strips. You’ll need: 2 pieces 14 cm x 11 cm (bag sides), 1 piece 12 cm x 2.5cm (closing strap), 2 pieces 24 cm x 1.5cm (handles)
- Lay the two large squarish pieces together and pin.
- Using a maker, draw 2 small squares (5 x 5 cm) in the bottom corners of the bag.
- Cut out the squares.
- Sew along the sides of the bag (leaving the cut corner open) and along the bag’s bottom.
- Align the side and bottom seams
of each corner and pin the edges together (see image). Sew along this edge to produce
a corner on which the bag can rest without toppling over.

Aligning the corner seams - Now to create handles for your bag. Pin each end of the handle strips on the inside of the bag. When pinning make sure that at least 2.5 cm of the handle strip is hidden below the bags edge and that all ends are aligned and pinned evenly. Stitch the handles securely in place.
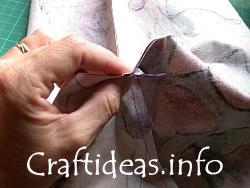
- Finally add the closing flap: Measure your chosen button and create an appropriately sized button hole at one end of the strip. Sew the other end of the strap to the outside of the back side of the bag. Fold the strap over the bag and use its button hole to mark where to sew your button. Sew the button.
Like us on Facebook or follow us on Twitter and stay up to date with the latest news and specials.
No comments:
Post a Comment